Putting paint on it finally
 October 29th, 2010, 03:38 PM
#1
Gary
Thread Starter
Join Date: Jul 2007
Location: Houston,Tx
Posts: 1,202
Putting paint on it finally
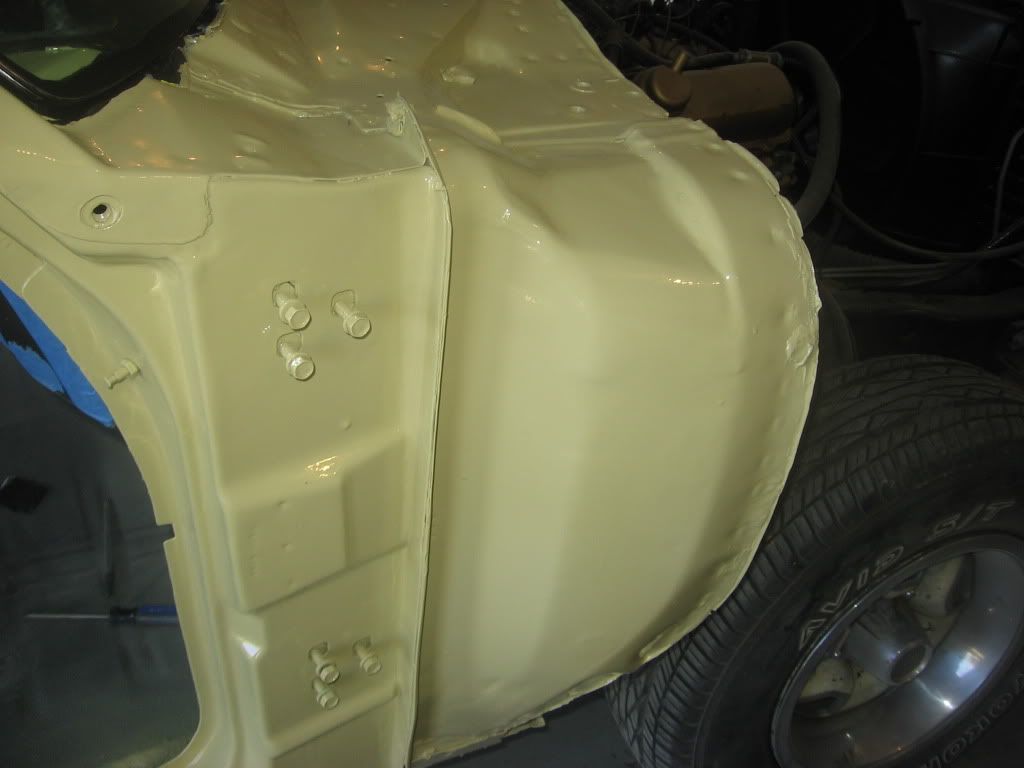
HERE ARE SOME OF MY PICTURES OF THE PAINTING I AM PUTTING ON MY 442. THE COLOR IS BAMBO WHICH IS THE ORGINAL COLOR OF THE CAR. I COULD NOT DECIDE WHat COLOR I WANTED TO PAINT THE CAR SO I JUST DECIDED TO GO WITH THE ORIGINAL COLOR WHICH LOOKS LIKE YELLOW BUT NOT BRIGHT. ALSO I WILL BE PUTTING BLACK VINYL ON THE CAR. THE CUTTING AND BUFFING IS GOING BETTER THAT I THOUGHT.I HAD MINOR ORANGE PEEL BUT I USED 1000, 1200 AND THEN 1500 SAND PAPER AND IT WAS NOT TOO BAD REMOVING. I AM CUTTING THE LEFT SIDE AND SHOULD STARTING CUTTING THE RIGHT ON TOMORROW. I CUT THE PAINT WITH MAGUIARS DIAMOND CUT AND NOW I AM GOING TO HAVE TO POLISH IT, WHICH I WILL ALSO BE USING THE MAGUIARS DUAL ACTION CLEANER/POLISHER.
IMG_0023.jpg
IMG_0025.jpg
IMG_0026.jpg
IMG_0027.jpg


IMG_0030.jpg
IMG_0034.jpg
IMG_0036.jpg
IMG_0035.jpg
IMG_0038.jpg
IMG_0037.jpg
IMG_0039.jpg
IMG_0040.jpg
IMG_0041.jpg
IMG_0042.jpg
IMG_0043.jpg
IMG_0044.jpg
IMG_0045.jpg
IMG_0023.jpg
IMG_0025.jpg
IMG_0026.jpg
IMG_0027.jpg
IMG_0030.jpg
IMG_0034.jpg
IMG_0036.jpg
IMG_0035.jpg
IMG_0038.jpg
IMG_0037.jpg
IMG_0039.jpg
IMG_0040.jpg
IMG_0041.jpg
IMG_0042.jpg
IMG_0043.jpg
IMG_0044.jpg
IMG_0045.jpg
Last edited by Gary's 2 442-S; October 29th, 2010 at 03:43 PM.
 October 29th, 2010, 04:23 PM
#2
car guy
Join Date: Apr 2008
Location: Dallas TX
Posts: 5,660
Over all looks pretty good. Did you paint yourself or have it done? I'm assuming a sealer coat was used between that set of pictures? It does look a little dry on the rh front 1/4 but should look pretty good once buffed as long as you have enough material to clean it up
I love the color. Will look killer with a black top
I love the color. Will look killer with a black top
 October 29th, 2010, 05:11 PM
#5
Gary
Thread Starter
Join Date: Jul 2007
Location: Houston,Tx
Posts: 1,202
Over all looks pretty good. Did you paint yourself or have it done? I'm assuming a sealer coat was used between that set of pictures? It does look a little dry on the rh front 1/4 but should look pretty good once buffed as long as you have enough material to clean it up
I love the color. Will look killer with a black top
I love the color. Will look killer with a black top
Last edited by Gary's 2 442-S; October 29th, 2010 at 06:09 PM.
October 29th, 2010, 05:15 PM
#6
Gary
Thread Starter
Join Date: Jul 2007
Location: Houston,Tx
Posts: 1,202
October 29th, 2010, 05:26 PM
#7
Registered User

Join Date: Jun 2008
Location: Near Muskegon Michigan
Posts: 1,015
Looks great! As I did my own body and paint and everything else. I do hope that you have lots of clear on her before color sanding. I went to 2000 grit and whished I had went to 3000 before buffing. Alot less work with the wheel.
I went to 2000 grit and whished I had went to 3000 before buffing. Alot less work with the wheel.
October 29th, 2010, 07:11 PM
#8
car guy
Join Date: Apr 2008
Location: Dallas TX
Posts: 5,660
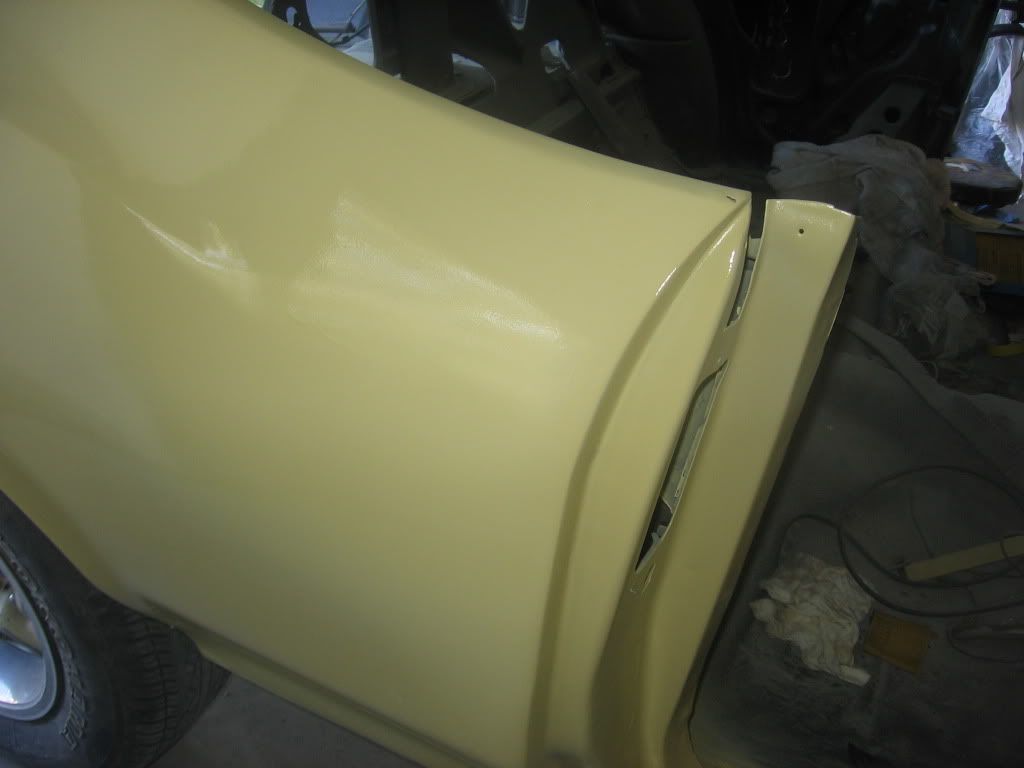
Is that a run I see here about 1/3 the way down and 8-9 inches back from the jam? If so very carfully shave it down a little at a time with a razor blade until almost flush. Then finsh the last little bit with paper. Good luck
IMG_0039.jpg
IMG_0039.jpg
October 30th, 2010, 04:38 PM
#10
Gary
Thread Starter
Join Date: Jul 2007
Location: Houston,Tx
Posts: 1,202
IMG_0055.jpg
IMG_0052-1.jpg
IMG_0050-1.jpg
IMG_0048-2.jpg
IMG_0047-1.jpg
also here is where I started the replacement of the quarter panel and truck


Last edited by Gary's 2 442-S; January 9th, 2012 at 09:19 AM.
November 4th, 2010, 09:35 AM
#11
Registered User

Join Date: Sep 2010
Posts: 3
Good job! What a lot of work you're going to but the bamboo color sure looks great.
---
Kansas city used car
---
Kansas city used car
January 4th, 2011, 01:08 PM
#17
Gary
Thread Starter
Join Date: Jul 2007
Location: Houston,Tx
Posts: 1,202
Yes I am, not too bad either. Just have a problem with the dust getting on it. But mainly the dust is getting in the clear coat I have been able to sand it out. I had thought about trying to rent a spray booth, but I have been painting in stages.
August 14th, 2011, 02:21 PM
#18
Gary
Thread Starter
Join Date: Jul 2007
Location: Houston,Tx
Posts: 1,202
here are some more pictures, got the fenders,hood on and striped the car. I have to do some adjusting on the hood.I plan on cutting and buffing on Tuesday and then put the vinyl top on next weekend.I will post more pictures when I put the vinyl top on which will be black also


IMG_0057-1.jpg


IMG_0057-1.jpg
IMG_0105.jpg
IMG_0106.jpg
IMG_0057-1.jpg
IMG_0057-1.jpg
IMG_0105.jpg
IMG_0106.jpg
Last edited by Gary's 2 442-S; January 9th, 2012 at 08:49 AM.
 January 9th, 2012, 09:43 AM
#21
Gary
Thread Starter
Join Date: Jul 2007
Location: Houston,Tx
Posts: 1,202


Last edited by Gary's 2 442-S; January 9th, 2012 at 09:57 AM.
January 9th, 2012, 10:05 AM
#23
Gary
Thread Starter
Join Date: Jul 2007
Location: Houston,Tx
Posts: 1,202
I got them just have not welded on yet. Also I got to put the sports mirror on driver side back on. I had to repaint because I chipped it
Last edited by Gary's 2 442-S; January 9th, 2012 at 08:01 PM.
January 9th, 2012, 11:31 AM
#27
Just an Olds Guy
Join Date: Jul 2008
Location: Edmonton, AB. And "I am Can 'eh' jun - eh"
Posts: 24,525
You've done a really nice job - car looks good. Would look great though if you put the headlight bezels on the right sides...The deep part of the bezel is supposed to be closest to the grill. 
January 9th, 2012, 12:57 PM
#28
Gary
Thread Starter
Join Date: Jul 2007
Location: Houston,Tx
Posts: 1,202
January 9th, 2012, 01:31 PM
#29
Just an Olds Guy
Join Date: Jul 2008
Location: Edmonton, AB. And "I am Can 'eh' jun - eh"
Posts: 24,525
Just commented because you appear to be doing such a nice job and I know it would be embarrasing at a show.....Just transpose them left/right. They need the alignment slots in the right place.
Just curious about a few things
1. On the rear deck stripes, why didn't you continue the stripes onto the quarter as original?
2. Those missing rear deck moldings on the curved sweep of the deck need to go on before the bottom flat piece. Did you have any problems mounting that trim with all the layers of clear coat? (like having to wetsand it down till the trim fit on ok?)
3. Should be a Rocket Trunk lid emblem over the lock area
I like your choice of original bamboo and vinyl roof with black stripes. You've got the 455/400 it looks like. Was your car a U code on the VIN? That could qualify it as a W30. Your hood lines up flawlessly - so unusual for a fibreglass part. Nice work. Is the hood OEM/come with the car?
How easy was the installation of the deck wing?
It's always nice to see a project that's coming along so well. Please don't mind the questions - they're all part of a resto fascination I go through each time I see one being done...
January 9th, 2012, 03:33 PM
#30
Gary
Thread Starter
Join Date: Jul 2007
Location: Houston,Tx
Posts: 1,202
Just commented because you appear to be doing such a nice job and I know it would be embarrasing at a show.....Just transpose them left/right. They need the alignment slots in the right place.
Just curious about a few things
1. On the rear deck stripes, why didn't you continue the stripes onto the quarter as original?
2. Those missing rear deck moldings on the curved sweep of the deck need to go on before the bottom flat piece. Did you have any problems mounting that trim with all the layers of clear coat? (like having to wetsand it down till the trim fit on ok?)
3. Should be a Rocket Trunk lid emblem over the lock area
I like your choice of original bamboo and vinyl roof with black stripes. You've got the 455/400 it looks like. Was your car a U code on the VIN? That could qualify it as a W30. Your hood lines up flawlessly - so unusual for a fibreglass part. Nice work. Is the hood OEM/come with the car?
How easy was the installation of the deck wing?
It's always nice to see a project that's coming along so well. Please don't mind the questions - they're all part of a resto fascination I go through each time I see one being done...
Just curious about a few things
1. On the rear deck stripes, why didn't you continue the stripes onto the quarter as original?
2. Those missing rear deck moldings on the curved sweep of the deck need to go on before the bottom flat piece. Did you have any problems mounting that trim with all the layers of clear coat? (like having to wetsand it down till the trim fit on ok?)
3. Should be a Rocket Trunk lid emblem over the lock area
I like your choice of original bamboo and vinyl roof with black stripes. You've got the 455/400 it looks like. Was your car a U code on the VIN? That could qualify it as a W30. Your hood lines up flawlessly - so unusual for a fibreglass part. Nice work. Is the hood OEM/come with the car?
How easy was the installation of the deck wing?
It's always nice to see a project that's coming along so well. Please don't mind the questions - they're all part of a resto fascination I go through each time I see one being done...
ly manual. One thing I did do with the spoiler was that I removed the short studs and replaced them with longer ones I was going to have to cut additional holes underneath to bolt it down and did not want any parts of that
Last edited by Gary's 2 442-S; January 9th, 2012 at 03:38 PM.
January 9th, 2012, 06:18 PM
#31
Just an Olds Guy
Join Date: Jul 2008
Location: Edmonton, AB. And "I am Can 'eh' jun - eh"
Posts: 24,525
A Thornton hood! Wow you're spending some serious $$$ on this car.
Who are you getting your interior from? Lots of guys here are recommending Legendary with the highest of marks.
I was curious about fitting the stainless because I have 4 coats of CC on my car too. But putting on the door edge guards and trunk reveal is super tight and I don't want to damage the paint installing them. I think I'm going to have to wet sand it down (probably start with 2000) until it fits ok. Then I'll have to polish before installing. Going to use new screws c/w the plastic washer.
re: stripes. Did you make your own stencil or get one from someone. They look really good.
tip: to avoid chipping or scratching paint? Tape off the area around where you are working. I use 2 or 3 layers of green painters tape. It's too thin for just one layer, but 2 or 3 prevents scratching or puncture. This is really effective when you're fitting bumpers, doors, fenders. I saw the 'gap' at the top of the drip rail. Looked to me like there was a missing part. How did you deal with that? (1st set of pics while car was in primer)
I thought about drilling a third hole for the base of the spoiler too. The originals had them that way. Glad to hear you used the mastic to seal the bottom fasteners inside the trunk - that's how GM did it too.
I know you're going to have a tremendous amount of fun driving and showing your car. Be sure to post those great pics for when you start doing the interior! You have the A51 Strato seats and console? There are several threads here that some of the guys have started that deal with restoring the dash and interior parts.
January 9th, 2012, 07:46 PM
#32
Gary
Thread Starter
Join Date: Jul 2007
Location: Houston,Tx
Posts: 1,202
The stripes came from Stencils And Stripes. Really great guy to deal with. I already have all the interior. I got all from Legendary in Dec 2010 during their sale.except the seats which I used Sems interior paint to change the color, see picture below. If it doesnt hold up I will get new seats but I will have them done in leather,IThe shop I used told me they could duplicate the present pattern with no problem . They also redid my dash.I only used 1500 to sand. I used Meguars Diamond Cur Compound 2.0 and followed that up with their Dual Action Polisher/Clearner and then their Polyseal. i also learned a hard lesson on not to use Harbour Freights sand paper on your clear.Those "missing peice on the drip rail I wasnt sure what sealed it becuase it was that way when I got it,but I did use seam sealer in them.

Last edited by Gary's 2 442-S; January 9th, 2012 at 07:54 PM.
January 9th, 2012, 08:20 PM
#33
Just an Olds Guy
Join Date: Jul 2008
Location: Edmonton, AB. And "I am Can 'eh' jun - eh"
Posts: 24,525
Those seats look amazing. You sure it's not the naugahyde cover? It feels and looks a lot like leather but isn't. I wouldn't worry about the SEMS paint. Once it's into the fabric it stays there for a good long time. This won't likely be a daily driver so I think it will hold up really well. I tried it on my rear seat and am really happy with it.
March 18th, 2012, 11:00 AM
#34
Gary
Thread Starter
Join Date: Jul 2007
Location: Houston,Tx
Posts: 1,202
gh5168 - What did you do when you painted yours?? A makeshift booth?? Howd ya keep it a clean job? Could I talk you into posting some pics of your job??
this reply is to HOT 442. I did not use a makeshift paint booth. Before I painted it I wash down the floor the day before I painted it. I wanted to put plastic up and make a booth but it was just not doable with my garage doors. I shot the base coat one day and then the next day I shot the clear. I did get dust in the clear when I shot it but it came out when I cut and buffed it. Sure a paint booth is ideal but people have painted their cars in garages,shed,outside or wherever. Why I painted my car myself was not to save the money but to gain the experience for my next project. I also do see why a really good paint job cost money. It's a lot of labor involved. It also gave me an opportunity to increase my tools because you are most certainly going to need them doing paint and body work. One thing I owuld do different would be to assemble everything and then shot.
this reply is to HOT 442. I did not use a makeshift paint booth. Before I painted it I wash down the floor the day before I painted it. I wanted to put plastic up and make a booth but it was just not doable with my garage doors. I shot the base coat one day and then the next day I shot the clear. I did get dust in the clear when I shot it but it came out when I cut and buffed it. Sure a paint booth is ideal but people have painted their cars in garages,shed,outside or wherever. Why I painted my car myself was not to save the money but to gain the experience for my next project. I also do see why a really good paint job cost money. It's a lot of labor involved. It also gave me an opportunity to increase my tools because you are most certainly going to need them doing paint and body work. One thing I owuld do different would be to assemble everything and then shot.
Last edited by Gary's 2 442-S; March 18th, 2012 at 11:06 AM.
March 18th, 2012, 12:49 PM
#35
Registered User
Join Date: Aug 2011
Posts: 127
Wow.
That is incredible work!
So just for clarification, you got a stripe stencil from S&S and painted them on or are they decals? At what stage did you paint on the stripes if painted?
Did you have the paint mixed for you or just buy it all (reducer, hardener etc) and then mix it when you did it....?
Sorry...last Q - how much dough do you figure you had in just the paint job alone...not including the 1/4's. Im just talking the paint and filler, sandpaper etc?
March 18th, 2012, 04:59 PM
#36
Gary
Thread Starter
Join Date: Jul 2007
Location: Houston,Tx
Posts: 1,202
Wow.
That is incredible work!
So just for clarification, you got a stripe stencil from S&S and painted them on or are they decals? At what stage did you paint on the stripes if painted?
Did you have the paint mixed for you or just buy it all (reducer, hardener etc) and then mix it when you did it....?
Sorry...last Q - how much dough do you figure you had in just the paint job alone...not including the 1/4's. Im just talking the paint and filler, sandpaper etc?
That is incredible work!
So just for clarification, you got a stripe stencil from S&S and painted them on or are they decals? At what stage did you paint on the stripes if painted?
Did you have the paint mixed for you or just buy it all (reducer, hardener etc) and then mix it when you did it....?
Sorry...last Q - how much dough do you figure you had in just the paint job alone...not including the 1/4's. Im just talking the paint and filler, sandpaper etc?
I did get those stripes from S&S and I did paint them on. What I found succesful for me was to clear the whole car the next day, then I waited a day and sanded the area on the car that I was going to put the stripes and then put the stripes on, I did not want to take a chance that the paint would not pull off when I taped it off over the base coat. This worked for me. I know I did not spend more than 2,000 on all the paint,epoxy primer, hardners,sand paper, cut and buff polishes, which I use Meguiars products for that. I would suggest that you dont use Harbour Freights sand paper however, I wasted my money on it. I got my sand paper, and polishes from Smart Shoppers http://www.smartshoppersinc.com/. I would say that good preporation is the key to a quality job. and also having a good paint gun. I was very suprised with the very little orange peel I had so I think the gun I used was the key. I know some people dont want to tackle a big project like I had but I learned a lot as I went and I would do it all over again. i guess we never really know what we can do unless we try. Also I had my local paint shop to mix my paint and that is the original color.
Last edited by Gary's 2 442-S; March 18th, 2012 at 05:02 PM.

Thread
Thread Starter
Forum
Replies
Last Post
rhett838
Small Blocks
5
August 24th, 2010 07:15 PM
steve19
General Discussion
3
December 29th, 2008 05:21 AM
1BAD68"S"
Chassis/Body/Frame
4
November 30th, 2006 07:21 PM


