How to fix rear window defroster on N-Body cars
 January 3rd, 2009, 09:17 PM
#1
Registered User
Thread Starter
How to fix rear window defroster on N-Body cars
This may also work with other newer GM cars, but I'm not sure
I did it today, boy it feels good to have a rear window defroster after being broken for about 5 years. I just wanted to know how to do it before tearing into the job, plus I always thought it was the modular itself that was bad, but it's the plug that melts causing the defroster to not work
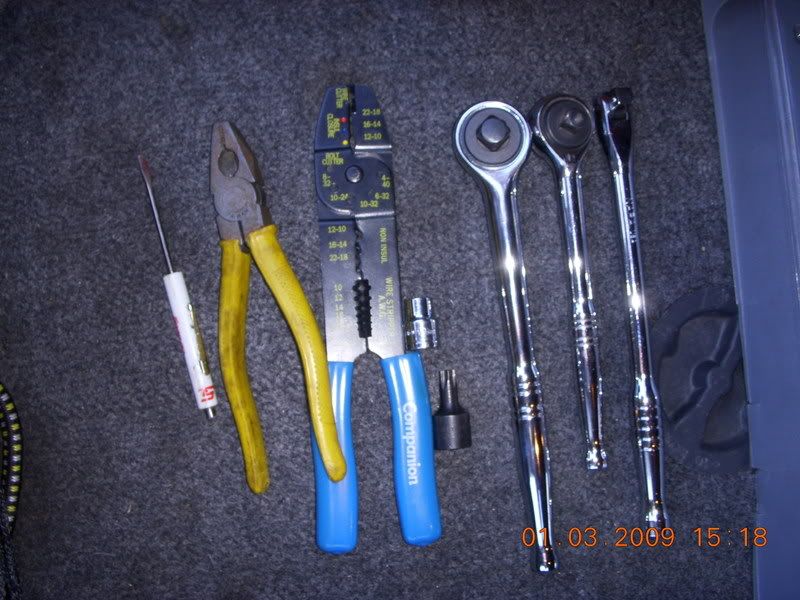
Tool for the job.
Breaker bar (3/8 drive)
10mm socket (1/4 drive)
1/4 drive socket
3/8 drive socket
t-50 socket (3/8 drive)
Thick pilers
small screwdriver
wire stripper and connecters for no soder
DSCN1254.jpg
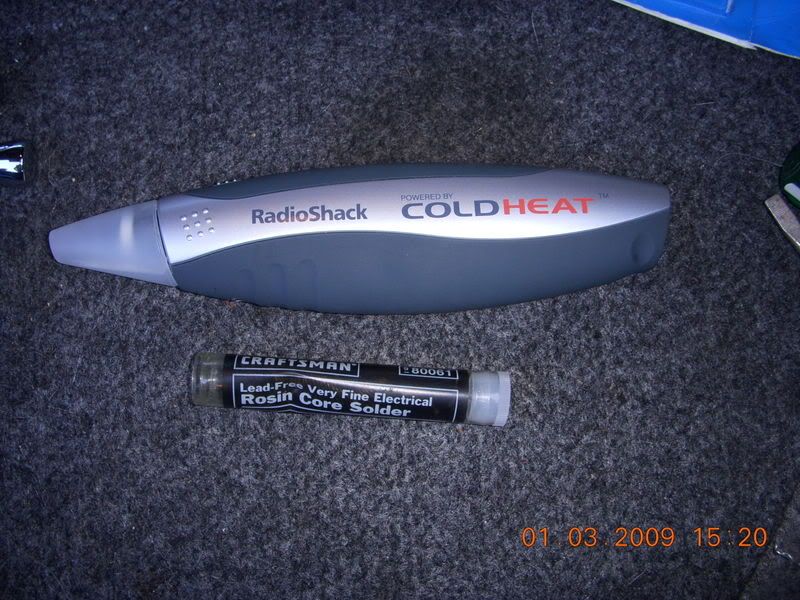
and for sodering
Sodering iron
Thinest electrical soder as possible
DSCN1255.jpg
Remember some steps are for 2 door models only
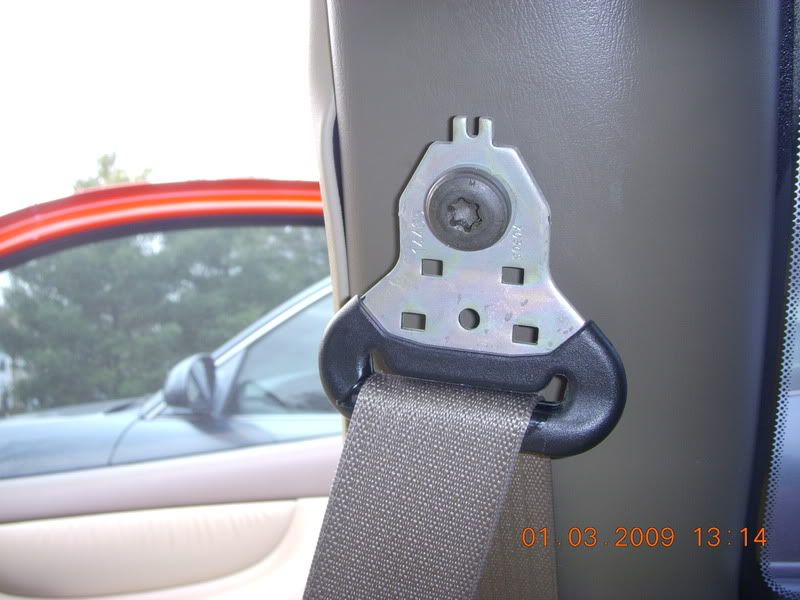
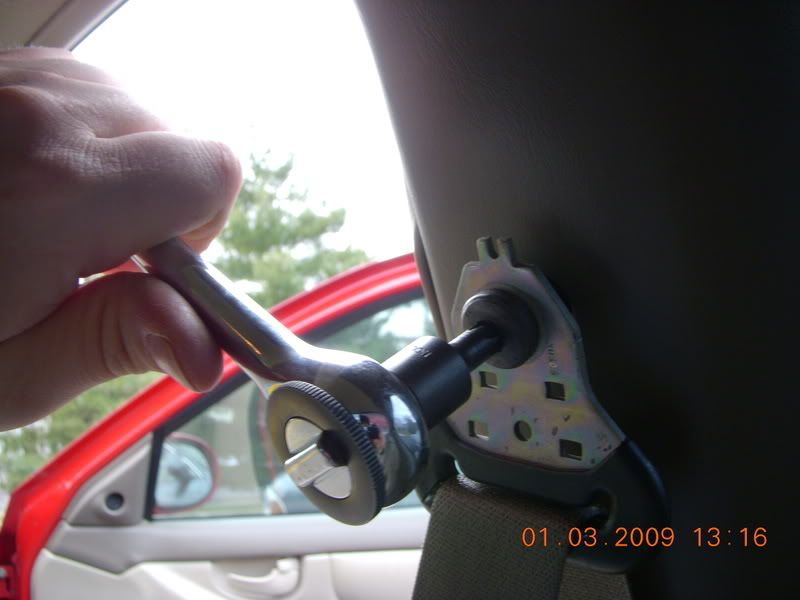
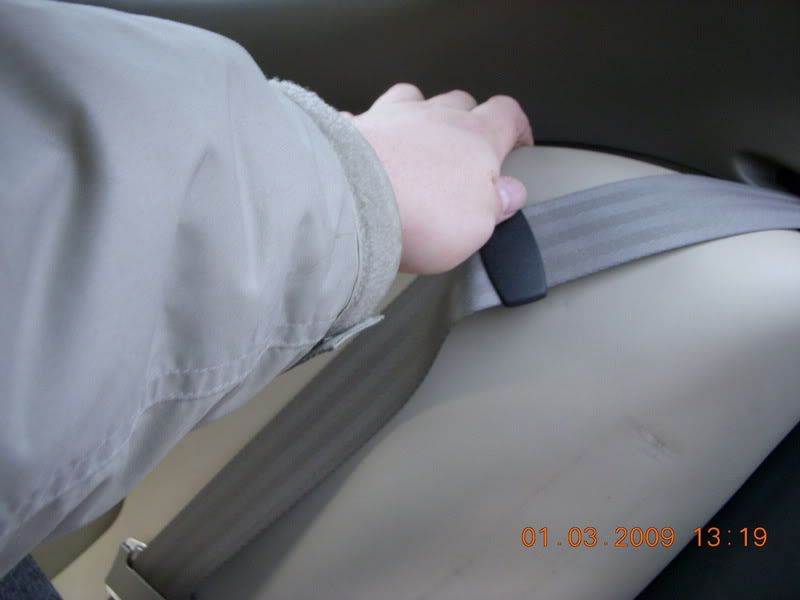
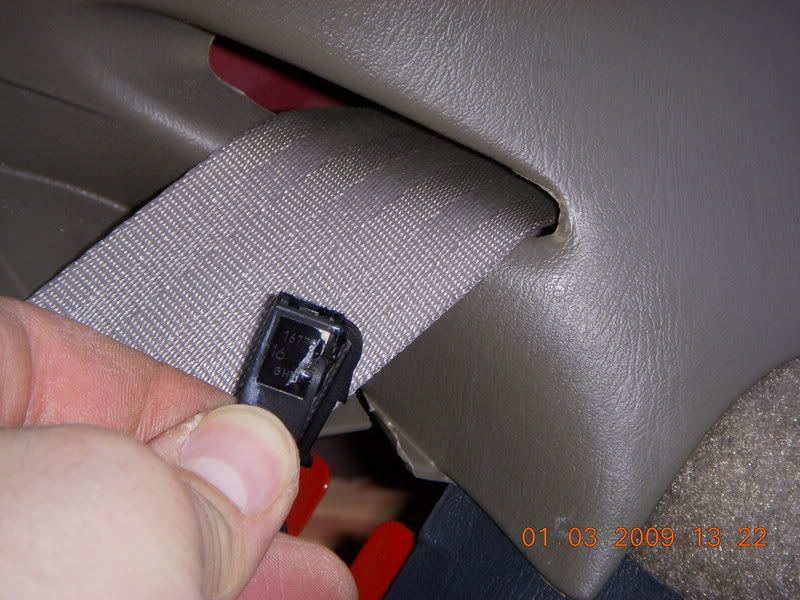
1. (2 door model) Use a T-50 to remove the seat belt bolt, use a breaker bar if necessary, it will move
DSCN1226.jpg
DSCN1227.jpg
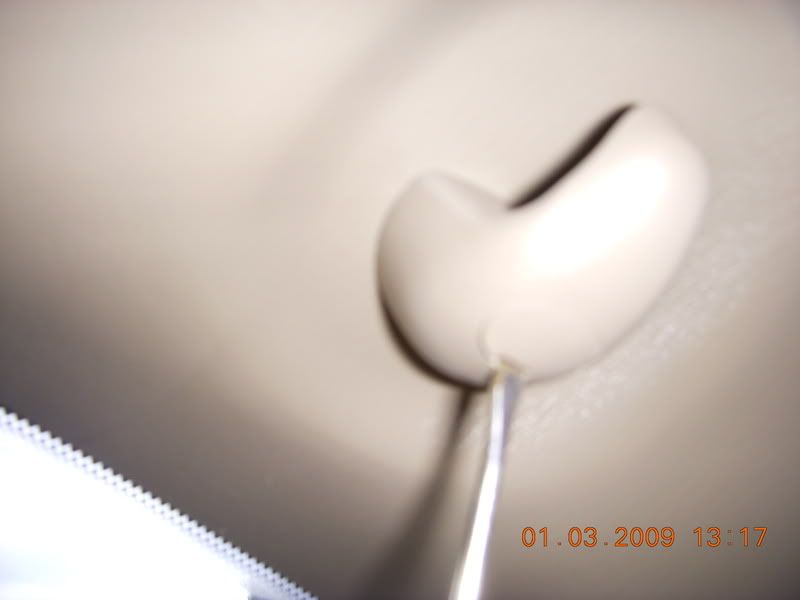
2. Use a small flathead screwdriver to pry out the plastic pin holding in the coat hook.
DSCN1228.jpg
3. Fold down the rear seat.
DSCN1225.jpg
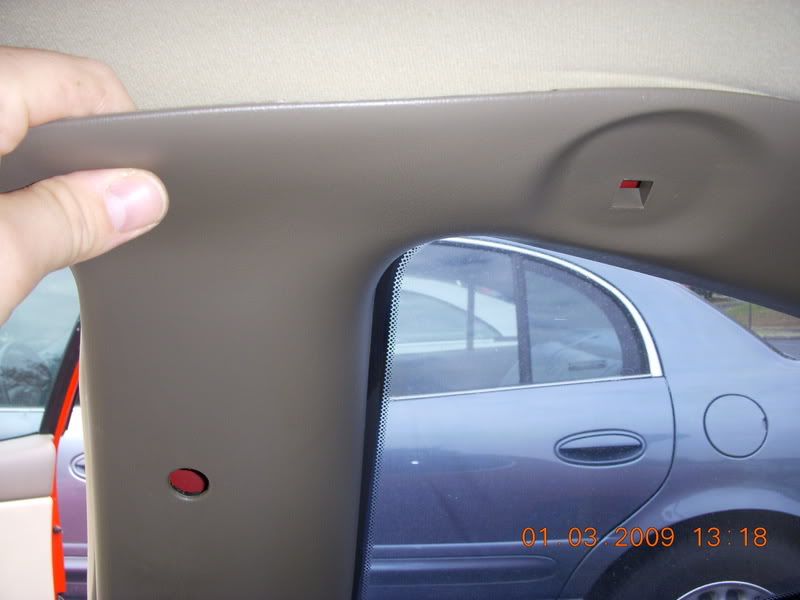
4. Gently pull the trim piece away from the body. Work around the edges.
DSCN1231.jpg
5. (2 door model???) Pull out this small panel. This prevented me from pulling the panel completely off the body. This has the hinge bar going thru for the fold down seats. Just pull and leave hang
DSCN1232.jpg
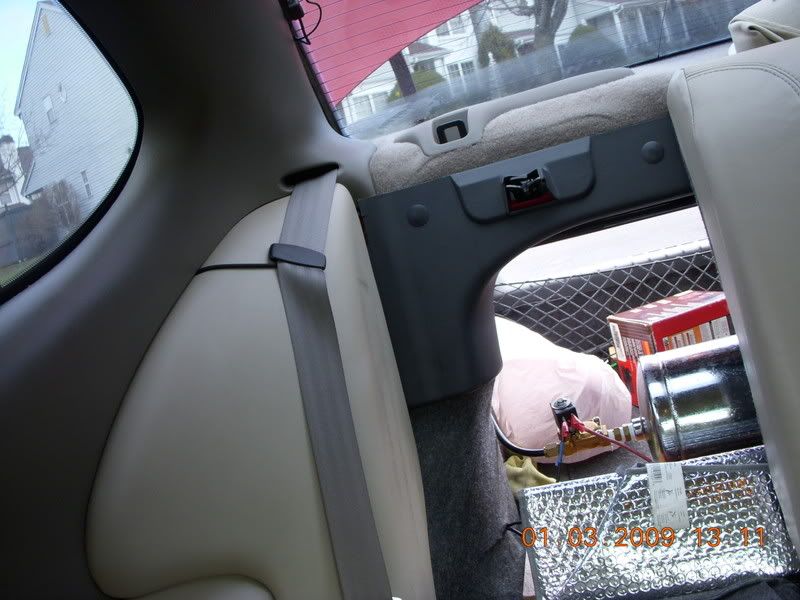
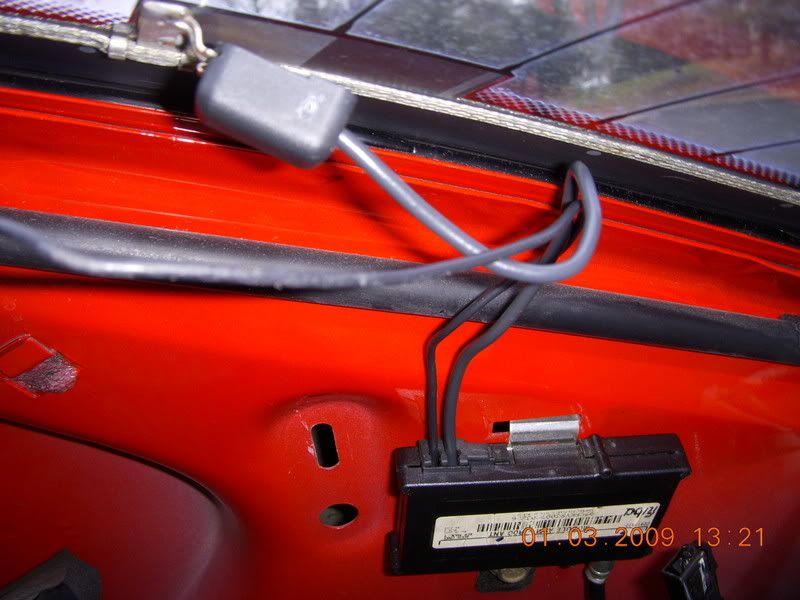
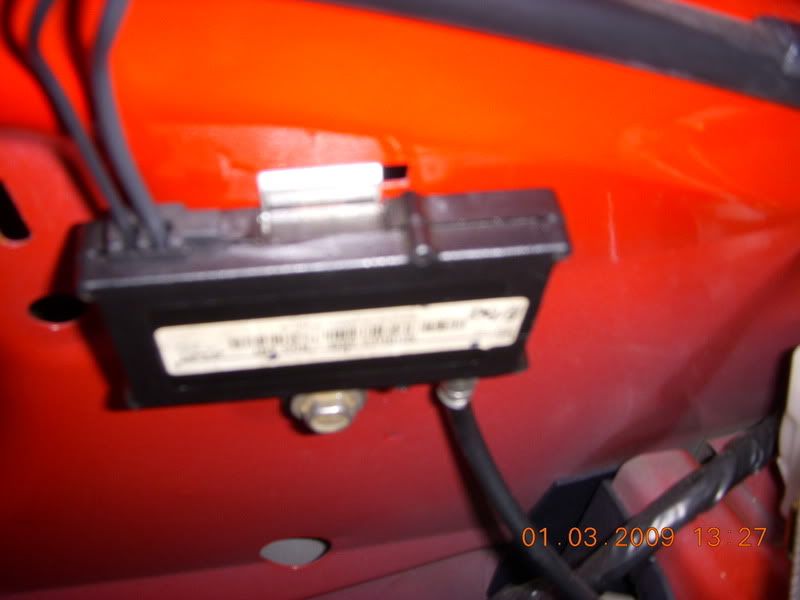
6. Now you can see the mod on the "C" pillar
DSCN1233.jpg
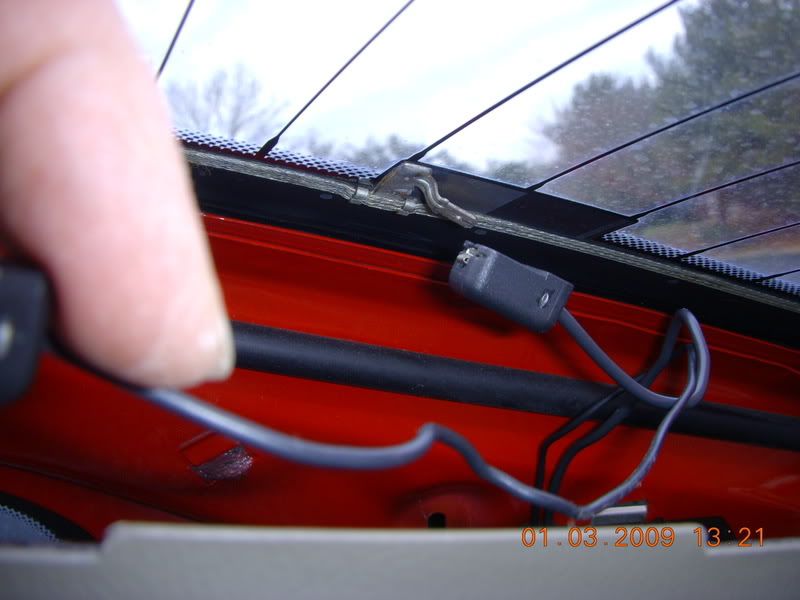
7. Unplug the window connectors
DSCN1234.jpg
8. Unplug the main plug from the mod. I pulled mine thru the seat belt area.
DSCN1235.jpg
9. Use a 1/4 drive socket and a 10mm socket to remove the bolt from the body
DSCN1237.jpg
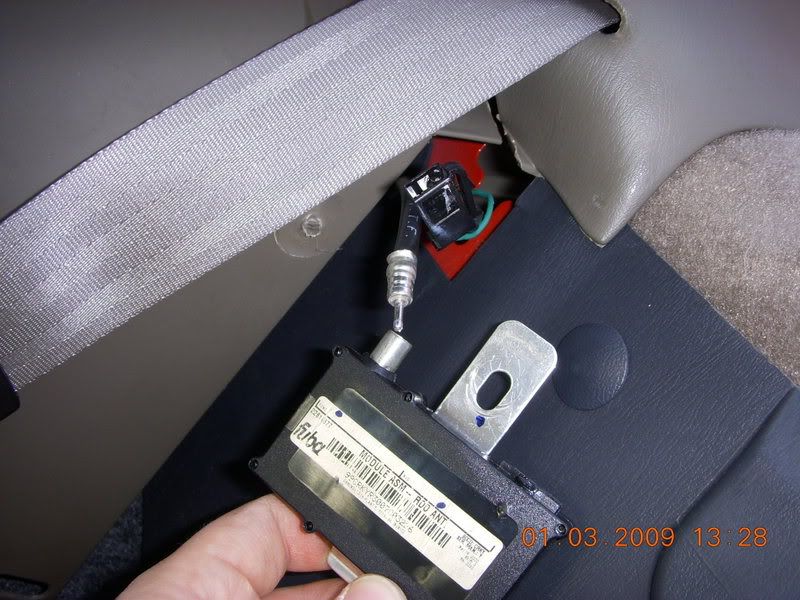
10. Pull the mod down and out from the seat belt area, and unplug the radio antenna
DSCN1238.jpg
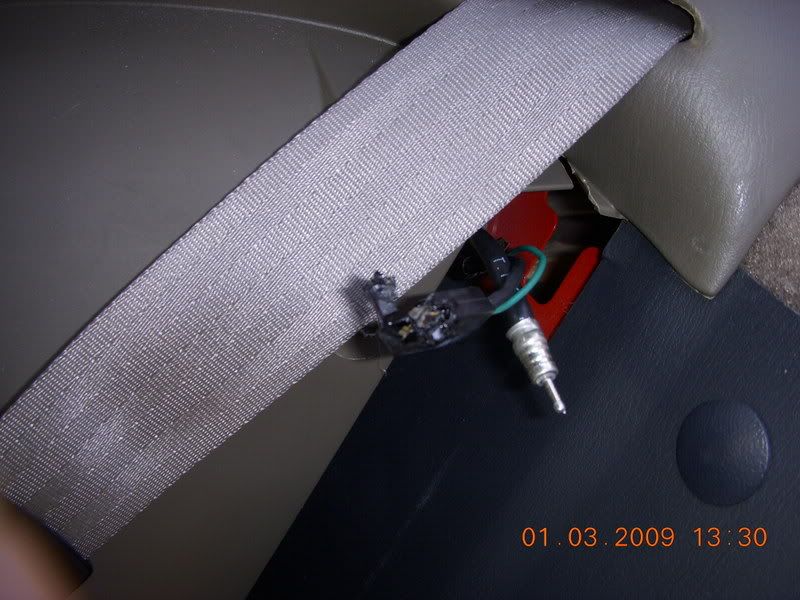
11. Now both plugs are free
DSCN1239.jpg
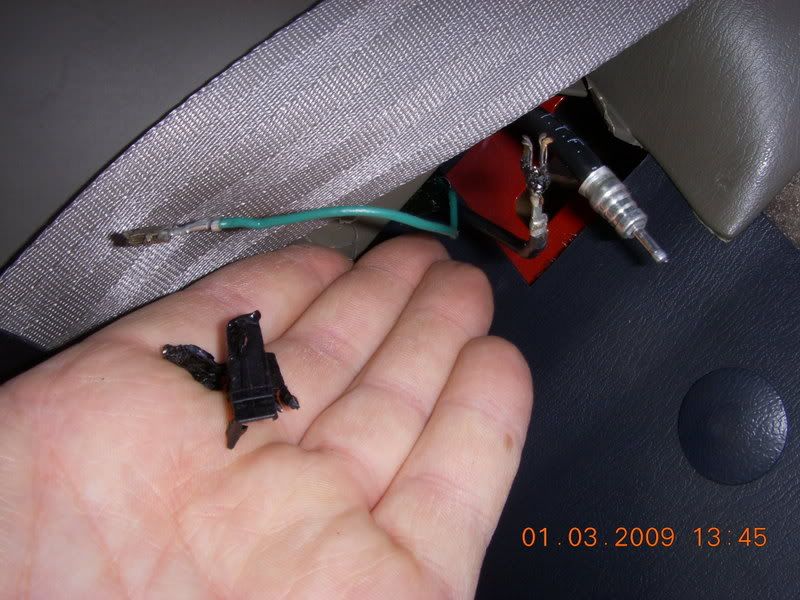
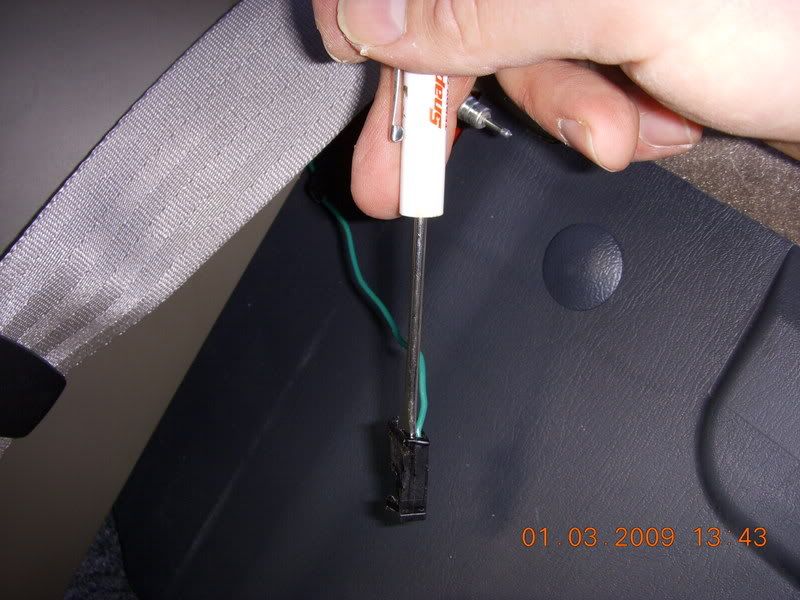
12. As you can see in step 8, the plug is melted away.Now you can cut the plug off and go to Step 13, or you can do this for sodering. Get the small screwdriver you used to remove the coat hook in step 2, and jam into the sides of the remaining plug. If it's melted away, it should be easy to break.
DSCN1236.jpg
DSCN1242.jpg
DSCN1243.jpg
13. To finish the job, a nice beefy pair of plyers to crack the casing off
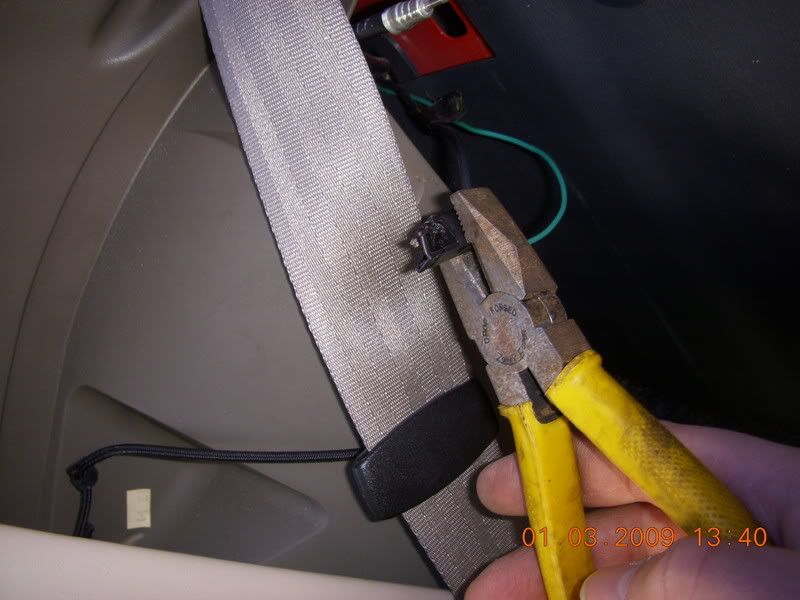
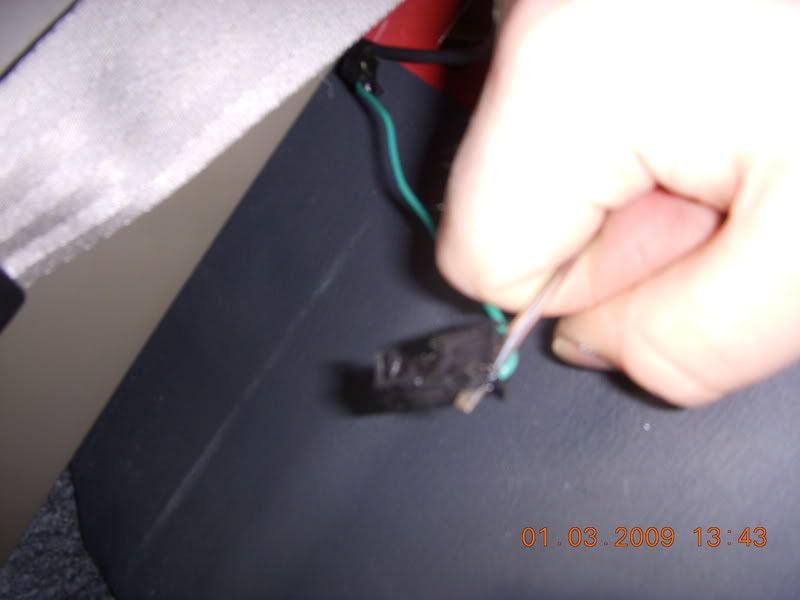
14. Remove the plug from the wires. You are not reusing the plug so it doesn't matter if you break it, just don't break the connecters inside it.
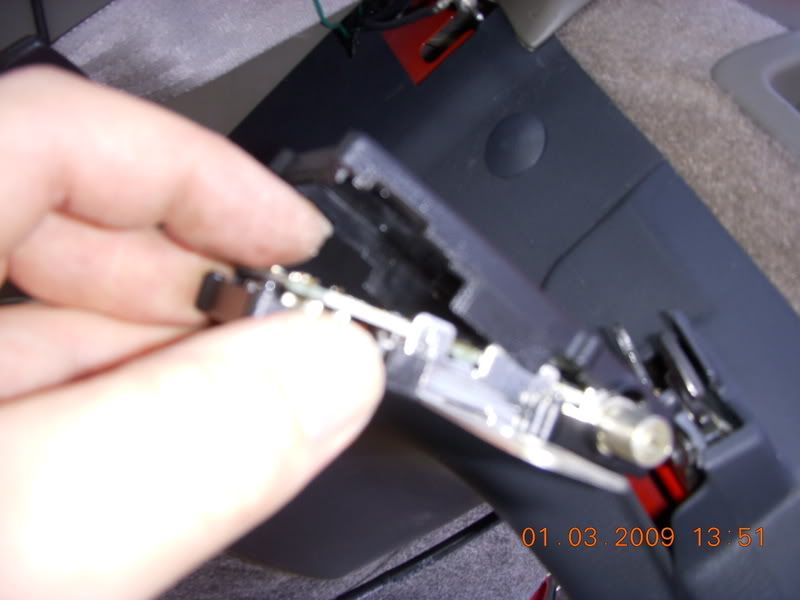
15. Open the mod around the egdes with the same small screwdriver. I bought another at the junkyard beforehand becuase I though the mod was the problem
DSCN1246.jpg
I did it today, boy it feels good to have a rear window defroster after being broken for about 5 years. I just wanted to know how to do it before tearing into the job, plus I always thought it was the modular itself that was bad, but it's the plug that melts causing the defroster to not work
Tool for the job.
Breaker bar (3/8 drive)
10mm socket (1/4 drive)
1/4 drive socket
3/8 drive socket
t-50 socket (3/8 drive)
Thick pilers
small screwdriver
wire stripper and connecters for no soder
DSCN1254.jpg
and for sodering
Sodering iron
Thinest electrical soder as possible
DSCN1255.jpg
Remember some steps are for 2 door models only
1. (2 door model) Use a T-50 to remove the seat belt bolt, use a breaker bar if necessary, it will move
DSCN1226.jpg
DSCN1227.jpg
2. Use a small flathead screwdriver to pry out the plastic pin holding in the coat hook.
DSCN1228.jpg
3. Fold down the rear seat.
DSCN1225.jpg
4. Gently pull the trim piece away from the body. Work around the edges.
DSCN1231.jpg
5. (2 door model???) Pull out this small panel. This prevented me from pulling the panel completely off the body. This has the hinge bar going thru for the fold down seats. Just pull and leave hang
DSCN1232.jpg
6. Now you can see the mod on the "C" pillar
DSCN1233.jpg
7. Unplug the window connectors
DSCN1234.jpg
8. Unplug the main plug from the mod. I pulled mine thru the seat belt area.
DSCN1235.jpg
9. Use a 1/4 drive socket and a 10mm socket to remove the bolt from the body
DSCN1237.jpg
10. Pull the mod down and out from the seat belt area, and unplug the radio antenna
DSCN1238.jpg
11. Now both plugs are free
DSCN1239.jpg
12. As you can see in step 8, the plug is melted away.Now you can cut the plug off and go to Step 13, or you can do this for sodering. Get the small screwdriver you used to remove the coat hook in step 2, and jam into the sides of the remaining plug. If it's melted away, it should be easy to break.
DSCN1236.jpg
DSCN1242.jpg
DSCN1243.jpg
13. To finish the job, a nice beefy pair of plyers to crack the casing off
14. Remove the plug from the wires. You are not reusing the plug so it doesn't matter if you break it, just don't break the connecters inside it.
15. Open the mod around the egdes with the same small screwdriver. I bought another at the junkyard beforehand becuase I though the mod was the problem
DSCN1246.jpg
 November 22nd, 2013, 09:42 PM
#2
Registered User

Join Date: Nov 2013
Posts: 1
Thanks for the walk though. My car has already been repaired once with the improved harness with two heavier wires but both grey and the same gage. Looking at the module I suspect they reversed the wires. Does the black heavier wire go to the inside, the retaining tab side of the harness? The thinner green to the smooth outside edge of the connector closest to the edge of the module? ( reverse is currently on mine) thanks.
This may also work with other newer GM cars, but I'm not sure
I did it today, boy it feels good to have a rear window defroster after being broken for about 5 years. I just wanted to know how to do it before tearing into the job, plus I always thought it was the modular itself that was bad, but it's the plug that melts causing the defroster to not work
Tool for the job.
Breaker bar (3/8 drive)
10mm socket (1/4 drive)
1/4 drive socket
3/8 drive socket
t-50 socket (3/8 drive)
Thick pilers
small screwdriver
wire stripper and connecters for no soder
and for sodering
Sodering iron
Thinest electrical soder as possible
Remember some steps are for 2 door models only
1. (2 door model) Use a T-50 to remove the seat belt bolt, use a breaker bar if necessary, it will move
2. Use a small flathead screwdriver to pry out the plastic pin holding in the coat hook.
3. Fold down the rear seat.
4. Gently pull the trim piece away from the body. Work around the edges.
5. (2 door model???) Pull out this small panel. This prevented me from pulling the panel completely off the body. This has the hinge bar going thru for the fold down seats. Just pull and leave hang
6. Now you can see the mod on the "C" pillar
7. Unplug the window connectors
8. Unplug the main plug from the mod. I pulled mine thru the seat belt area.
9. Use a 1/4 drive socket and a 10mm socket to remove the bolt from the body
10. Pull the mod down and out from the seat belt area, and unplug the radio antenna
11. Now both plugs are free
12. As you can see in step 8, the plug is melted away.Now you can cut the plug off and go to Step 13, or you can do this for sodering. Get the small screwdriver you used to remove the coat hook in step 2, and jam into the sides of the remaining plug. If it's melted away, it should be easy to break.

13. To finish the job, a nice beefy pair of plyers to crack the casing off
14. Remove the plug from the wires. You are not reusing the plug so it doesn't matter if you break it, just don't break the connecters inside it.
15. Open the mod around the egdes with the same small screwdriver. I bought another at the junkyard beforehand becuase I though the mod was the problem
I did it today, boy it feels good to have a rear window defroster after being broken for about 5 years. I just wanted to know how to do it before tearing into the job, plus I always thought it was the modular itself that was bad, but it's the plug that melts causing the defroster to not work
Tool for the job.
Breaker bar (3/8 drive)
10mm socket (1/4 drive)
1/4 drive socket
3/8 drive socket
t-50 socket (3/8 drive)
Thick pilers
small screwdriver
wire stripper and connecters for no soder
and for sodering
Sodering iron
Thinest electrical soder as possible
Remember some steps are for 2 door models only
1. (2 door model) Use a T-50 to remove the seat belt bolt, use a breaker bar if necessary, it will move
2. Use a small flathead screwdriver to pry out the plastic pin holding in the coat hook.
3. Fold down the rear seat.
4. Gently pull the trim piece away from the body. Work around the edges.
5. (2 door model???) Pull out this small panel. This prevented me from pulling the panel completely off the body. This has the hinge bar going thru for the fold down seats. Just pull and leave hang
6. Now you can see the mod on the "C" pillar
7. Unplug the window connectors
8. Unplug the main plug from the mod. I pulled mine thru the seat belt area.
9. Use a 1/4 drive socket and a 10mm socket to remove the bolt from the body
10. Pull the mod down and out from the seat belt area, and unplug the radio antenna
11. Now both plugs are free
12. As you can see in step 8, the plug is melted away.Now you can cut the plug off and go to Step 13, or you can do this for sodering. Get the small screwdriver you used to remove the coat hook in step 2, and jam into the sides of the remaining plug. If it's melted away, it should be easy to break.
13. To finish the job, a nice beefy pair of plyers to crack the casing off
14. Remove the plug from the wires. You are not reusing the plug so it doesn't matter if you break it, just don't break the connecters inside it.
15. Open the mod around the egdes with the same small screwdriver. I bought another at the junkyard beforehand becuase I though the mod was the problem

Thread
Thread Starter
Forum
Replies
Last Post


